Min filter, also known as Minimum filter, is one of the fundamental denoising operations in image processing. This article is your guide to understanding the Min filter and implementing it using the Python programming language. We’ll learn the fundamental principles of the Min filter and most importantly, how to leverage its capabilities using Python and OpenCV.
What is the Min Filter in Image Processing?
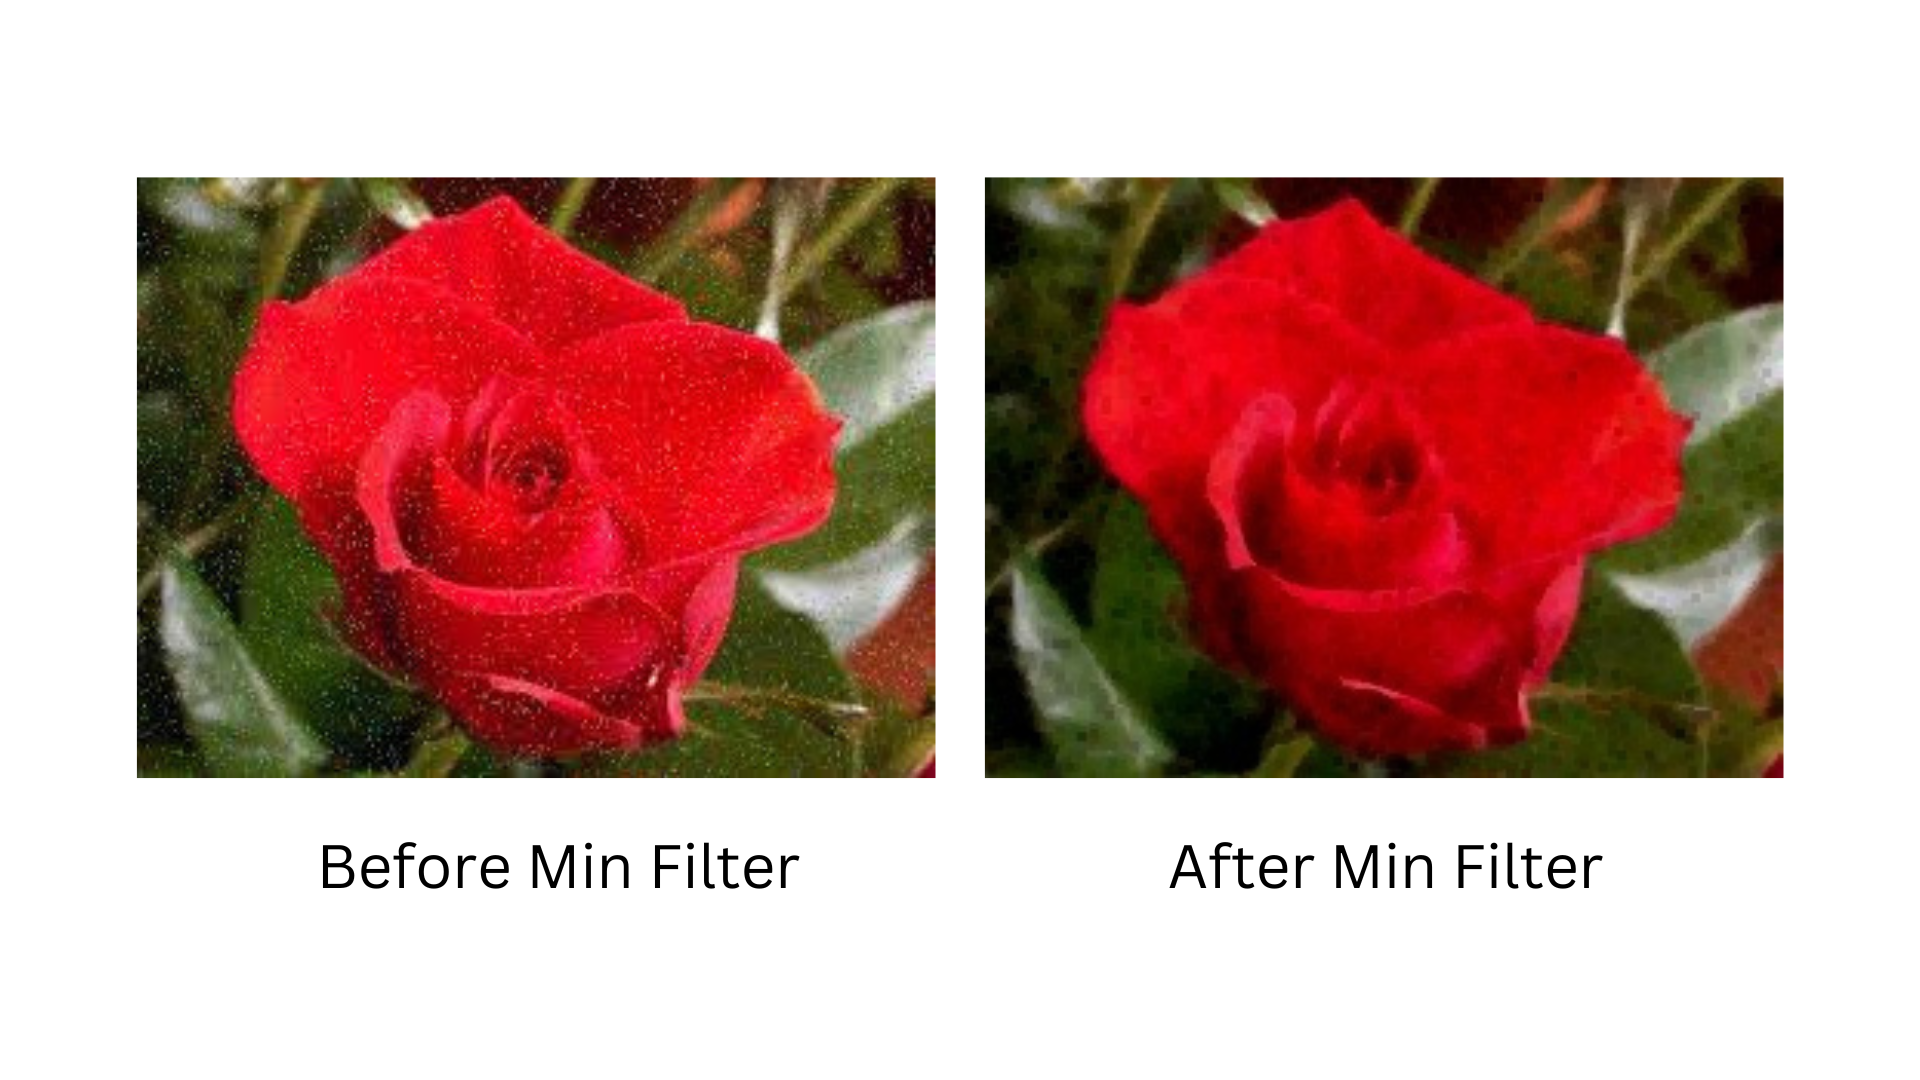
The Min filter is one of the fundamental operations of noise reduction or enhancement of certain image characteristics in image processing. This is a type of nonlinear filter that replaces each pixel in the output image with the minimum value from the neighborhood of the corresponding pixel in the input image.
The neighborhood is defined by a kernel, which is a small matrix or window that moves across the input image (a process of convolution). Typically this matrix is 3 x 3, 5 x 5, or 7 x 7 in size.

The minimum filter is especially useful for scenarios such as removing white noise because it chooses the darkest pixel in the neighborhood, detects edges, and improves the visibility of certain objects in images.
Implementing Min Filter in Python
In this tutorial, we will use the popular image processing library OpenCV. OpenCV is an open-source library of computer vision, image processing, and general-purpose numerical algorithms.
Make sure you have OpenCV installed, and if that’s not the case, you can install it using the pip command:
pip install opencv-pythonNow let’s jump into implementing the Min filter in Python. For this, we need an input image with some noise.

Before reading the input image make sure that it is in the same folder as your code, so you could just put the name; otherwise input the whole path of the image.
# importing all needed libraries
import cv2
import numpy as np

# loading the input image
input_image = cv2.imread('input.jpg')

# defining the kernel size
kernel_size = 3  # you can choose 3, 5, or 7

# applying the Min filter using cv2.erode() function
output_image = cv2.erode(input_image, np.ones((kernel_size, kernel_size), np.uint8))

# saving the output image
cv2.imwrite('output.jpg', output_image)

# displaying the input and output images
cv2.imshow('Input Image', input_image)
cv2.imshow('Output Image', output_image)
cv2.waitKey(0)
cv2.destroyAllWindows()
After importing the libraries, reading the input image, and defining the size of the kernel, the main function we use is cv2.imread().
The cv2.erode() function is used to perform morphological erosion operations images. The cv2.erode() function works by moving the kernel around the original image. At each kernel position, it calculates the minimum pixel value of the original image in the neighborhood. As a result, the number of bright areas will be reduced or smoothed out.
Wrapping Up
Thus, the Min Filter is a fundamental image processing technique for noise reduction in image enhancement, where we replace each pixel of the input image with the minimum value from its neighborhood.
Using Python and the OpenCV library, we easily implemented the Min filter. For that, we have used OpenCV’s build-in cv2.erode() function achieved noise reduction, and improved the quality of the image while preserving color information.
Stay tuned for more image processing techniques debugging!